Prototype 2

My second prototype was a written three act structure. The purpose of the three act structure is to organize the story of the short film. The structure breaks down the film in multiple parts for example there is a section called normal world, inciting incident, call to adventure, and more. The story is obviously crucial to the overall success of the film. For my film I am going to be switching up the genre is frequently so it’s important that I have a strong storyline that continues throughout the entire film despite the various changes it will go through. It can be very difficult to keep the story in order when dealing with multiple genres so this three act structure was helpful in organizing all of my ideas.

I had some classmates review my story during our last class meeting. It seems that the story was interesting and indep. This three act structure was about half of the film and I plan on doing another three act structure for the second half of the film. Something that I will keep in mind is making sure that I am creating a story that is possible for me to do. For example I have to make sure that I choose the correct settings to film and not plan a story line around a setting that I won’t be able to have access to. I plan on revising my story even more and will continue to make little tweaks and changes until I get my story line tight.

Prototype #2

In my original prototype plan, I had said the 2nd prototype would be photographs of hand motions during crocheting. However, I was provided with a Leap Motion Controller the week before and decided to give that a go.

I attempted to setup the Leap Starter Development Kit (SDK) on my laptop and unfortunately in class last week, I couldn’t open the program or get the USB port on my computer to sense that the Leap controller was plugged in.

Although, this week, I finally managed to make the program work. I figured out that the Leap motion program senses the user’s hand (or hands), displays it on the computer screen, and automatically creates a rig for their hand(s). It’s really neat!

I’ve been trying to figure out how to get it to sense an object that the user is holding (in my case, the objects would be the crochet hook and yarn). I believe the phrase for sensing that is “tool tracking.” I wanted to figure that out for the next prototype phase, but sadly, I haven’t had any luck in finding the setting or application within the program that rigs objects. So, my next prototype, is going to be a mock up of how the interactive stitcher will look on screen. I’m going to take a screenshot of my rigged hand in the Leap motion app, and edit in the guide dialogue, the crochet hook, and the pattern. So I’ll be showing those prototypes and letting people test out the Leap Controller at Art After Dark.

Prototype #2

For my second prototype, I decided to steer away from the visual aspect of things and focus on the implementation process. I worked in the program, Max, which I will potentially be using for the final project. I figured out how to set up my MIDI keyboard through Max and I made it so that the user can select between a number of different instruments to play with (just like any normal keyboard would). The difference is that I made it easy to understand, separating the different instruments families into categories and only selecting the instruments that create pitches, rather than sound (i.e. trumpet vs. woodblock).

Even from working with the sounds myself, I realized that a lot of these instruments sound terrible. The reason for this is because I was using general MIDI data to generate the sounds of each instrument. Based on the feedback I received, the main criticism was the quality of instrumentation and making each instrument sound realistic. Dr. Nakra suggested that I either find a source of instrument MIDI files online, or commit to a long and tedious process in Logic. Doing it through Logic would involve the following: play a single note with the instrument track I want, bounce that individual note as a wav file, import that file into Max, rinse and repeat with every note of every instrument. I’m still trying to decide on a realistic approach to the quality of instruments, and I’m glad to hear any suggestions. For the mean time, general MIDI instruments will be my audio source for the final prototype.

In addition to setting up the Max patch, I’ve also been researching on the function “Jitter” in Max, which will allow me to display graphics in real time. I hope that in the future, I will master this function and be able to implement my visuals into the Max patch.

Prototype #2

For prototype 2, I decided to delve into some asset creation in the form of some weapon modeling. This turned out to be a slightly more harrowing task than I figured it would be, but I quickly adapted. The trouble was in just the couple of first days working with the 3DS Max software. I’ve used this software before so I’ve had some experience, as well as with other similar programs like Maya. However, it’s been a while, so it took some time and some tutorials to get used to all of the controls. The tutorial I used for the purposes of this prototype was this from this awesome series that delved into model creation, UV unwrapping, and texturing.

I wanted to create a bladed weapon for this prototype that could eventually be brought into Fallout 4 as a wieldable single-handed melee weapon. Following the aforementioned tutorial, I followed his workflow while he created his blade and translated that to the creation of mine. I had a different design of blade than him, his a modern kukri and mine a WW2 pilot’s machete, so I couldn’t follow it 100%. Regardless, I think I made a pretty awesome model.

Then it was on to the texturing in the program Surface Painter. I never used this program before, but I followed the same workflow from the same tutorial and created something much different than the example he was making. I wanted an old machete from some soldier long dead from the time when the bombs dropped. Thus, this machete is textured to look very old, worn, and damaged, but still sharp enough to cut a fool.

So there it is. Everything I did for prototype 2. I ultimately had fun doing this and can’t wait until I manage to get it in game. I hope to be able to also model a gun or two for my final mod as well. I learned from this prototype that modeling, UVing, and texturing takes a bunch of time to do it right. But to me, is very worth it.

Prototype 2

The second Prototype I was working on focuses on more of the story I was writing, as well as the adding more to it. The feedback will help me fully complete my story and become the main idea for my project. I hope to fully get advice for the story and use that for writing. If more detail is needed, it will be added. However, I did not get much feedback for the second prototype, and hope to finally finish the story. This prototype told me to continue writing and make something amazing. I hope to make it all the way.

Prototype 2

For my second prototype, I constructed a row of my spice rack out of cardboard and paper. I’ve noticed that I’ve been having a difficult time getting others to picture my project, so I decided to build a simple visual aid. I plan to present this at AIMM After Dark as well. My cardboard rack includes my intent to implement a tracking device that will know where every spice is on the rack. I will also explain the alternative QR-esque tracker that I discussed in class with Professor Ault.

Presenting this prototype was not my original idea. I had planned to work with Arduino and LEDs this week, but decided I really needed this visual aid for presenting purposes. I am still challenged with researching sensors and finding a way to work this into my project. This has by far been the biggest obstacle in my path. I hope to at least discover a solution to this before my third prototype.

I learned a lot from talking to Professor Ault about sensors. Instead of something involving RF, I could look into QR codes with a camera constantly tracking the position of all the codes above the spice rack. For this, I’d need some sort of tiered design instead of a stacked rack. This prototype has opened the floor for more questions and understanding from people I present this to, which has also led to more in depth discussion and contemplation on my part.

Canvas Assignments

For my prototype this week, I decided to work heavily on the Home Screen. This includes a title, logo, and sign up bar. I am currently working with a friend on developing a formal logo/icon to represent the app. Besides that, I will attach what I have been creating for the Home screen.

I have also been trying to get the About Page figured out– I need to have the perfect copy for this so that people will understand what the app is for, and how to use it as well as how not to use it (aka making it a safe space)

For my elevator pitch: My app is designed to connect music-lovers with local musicians/bands in their area. (how do i make this sound like it’s not a dating app???) This app will be organized by state and will allow users to find information on the bands they like including their events, socials, merchandise, and live streams. Additionally, they will be able to interact with other users/musicians in forums depending on their questions/topics of interest.

-Since I am abroad, I had no one to receive feedback from regarding my last prototype. I asked a few of my coworkers who had a few questions in response:

-how the thesaurus will work- will there be a limit of bands?

-how will the sign up work for bands? specific page and questions asked.

-what if multiple people are live streaming the same event?

-how will you implement your map/location based services when building.

These are a few questions that I will be answering as I continue to prototype and eventually build my app.

Industry Events I Attended

On November 10th, I got the chance to go to the Museum of Modern Art to see the latest exhibit, Bruce Nauman’s Disappearing Acts. I would’ve written about my experience earlier, but it has been a hectic couple of weeks, plus I wanted to keep my options open if I found another industry event that sounded interesting and that I could go to.

Anyhow, here’s a picture of my IMM friends and I on our way to the MoMA :

Image may contain: Jill Merbach and Patrick Haywood, people smiling, sky, closeup and outdoor

And here’s another photo of me in front of a painting at the MoMA (I would’ve taken one in the Disappearing Acts exhibit but the lighting in that room wasn’t very good):

Image may contain: Jill Merbach, smiling

What was really neat about Disappearing Acts was that museum visitors could directly interact with parts of the exhibit. There were hidden cameras and motion sensors set up around the showroom so you could see different angles of yourself on the TV monitors sitting in the middle of the room, but you couldn’t spot where the camera was.  Then, in another showroom within the exhibit, there were small transparent walls that would sense when you were near them and would begin speaking. Relating back to my thesis project, these parts of the exhibit made me want to have the users’ hand motions be projected onto a screen and have a verbal guide leading the user through the steps of crocheting.

There was also a part of it that I enjoyed that wasn’t interactive. I stumbled upon a wall of phrases in neon lights and it was timed so each different phrase would light up at a different time. Here’s a picture I took of it:

No automatic alt text available.

If you’d like to read more about the exhibit and artist Bruce Nauman, check out the official page on the MoMA website. It’s very interesting!  https://www.moma.org/calendar/exhibitions/3852? 

Also, the week before, on November 5th, I had the chance to attend Jesse Schell’s VR and AR seminar in Mayo Concert Hall. If you didn’t get the chance to go, that was also a really neat event because Jesse Schell talked about running his own VR gaming company and gave a lot of good insight on the future of VR and AR.

I don’t clearly remember every detail of what he said/showed (I was struggling with a serious cold and migraine that night, which didn’t help) but I do remember him talking about his experience working at Disney, showing the ad for his latest VR game called “We Want You to Die”, and showing how far video chatting and interactive toys have come, and how they’re going to change the future generations way of connecting/communicating. It made me think of how my thesis project – and also everyone else’s thesis project – will positively affect and change the future of interactive innovations and connecting.

Here are a couple of pictures I took during the seminar:

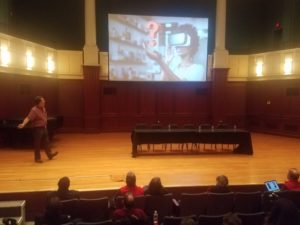
Jesse Schell was quite a fun and interesting character, too. He started the seminar off by playing harmonica for the audience! It was very entertaining.

Overall, I really enjoyed both of the industry events I went to and would suggest that other people check out the Disappearing Acts exhibit (it’s still on display through the end of February 2019) and looking into Jesse Schell’s work. My advice is to always go to conventions, interactive exhibits, and seminars if you ever get the opportunity because I’ve gotten to experience many and have had an amazing time at each and every one that I’ve attended.

Research Plan 3rd Update

Project Objective:  An action game where the player moves along three horizontal parallel lines to limit movement so that I can quicken the speed of combat game play.

RESEARCH

Pixel Art and Coding

For my research I continue to review YouTube and Lynda.com.  Both of these sites have provided me with great information.  On Lynda.com I am able to focus and research on specific topics as it relates to Unity.  I have found this to be very useful.  Some of the topics I’ve been researching include loops, general programming habits, and creating classes.  Another aspect of Lynda.com which has assisted me in my research is their asset store which I’ve learned about Cinemachine.

Cinemachine is an application for 2D professional camera tools for Unity that provide access to camera control at AAA game level.  By using Cinemachine it should assist with some issues I’ve been experiencing as well as save some time.  I am just starting to explore this and to understand how it could enhance and improve my final project.

My exploration and research on YouTube continues and I have discovered a number of channels which are dedicated to Pixel art.  One channel which I have found to provide some simple direction is Brackeys (http://patreon.com/brakceys) .  Through Brackeys there are coding tutorials, tips and tricks.

I have also researched channels dedicated to the drawing of anatomy.  A particularly good one is ProkoTV on YouTube.   This is led by Stan Prokopenko who is an artist and teacher and has created a number of instructional art videos.

A lot of what I’ve learned is how the animation design is essential to convey the essence of your characters.

Similar to Brackeys I have also spent time researching on MortMort which is also on YouTube but is also available on mortmort.net.  This person also provides numerous tips and special ways to code line which assists in breaking down the Pixel art for line development.  MortMort further shares how he goes about his game development using Asperite for Pixel Art, Photoshop for digital painting, Stencyl for simple 2D games and Unity for more complicated games.  I found all of this interesting and additional topics for further research.

As I continued to research further into Pixel art I found a YouTube channel called “The Verge” which has a great documentary web series on Japanese designers.  This is a Toco Toco TV and is an ongoing web series.  The episodes are in Japanese but you can turn on subtitles.  Each of the episodes are interesting and I find some more useful than others but in general a good resource for which is needed in game design.  A few of the interviews I’ve watched include Yoko Taro, director of Nier: Automata which touches on his creative process as well as why his games feel a bit different than others or as I like to say “goofy”.  Another is the director of Persona 5, Katsura Hashino which touches on creating a game in the city of Tokyo and being real-world focused.  Toco Toco is now Archipel as they have evolved this channel but the interviews are still known as Toco Toco.

https://www.youtube.com/channel/UC3zoY9LapZERsN7caDKqz0w/about

Research Plan – 2nd UPDATE

Project Objective:  An action game where the player moves along three horizontal parallel lines to limit movement so that I can quicken the speed of combat game play.

RESEARCH

Aesthetic Visual

My ongoing research has moved to the aesthetic of the game.  What will the world my characters inhabit as this will help me to focus on what my characters stories and actions.  What I learned is I will need to determine what actions I will be developing and then fit my aesthetic around the function.

Based on this knowledge my game will be a city setting with very linear movement which is better aligned to narrow streets, alleys and tunnels.  This city setting will allow for linear game development more closely.

As I progress through this project I can determine how realistic I want this to be or if I want it to take a more goofy turn.  For example when researching Mario games, you will note when you jump on an enemy it will stop and be a static object.  They way Mario overcame this to make it more aesthetic so the enemy became a turtle, so when the hero jumped onto the enemy which is the turtle, it retracted into its shell.

Other games I researched that have this street, alley and city type fighting are from CapCom’s Fatal Fury and Street Fighter.

I also looked to the movies for inspiration and the movies which I felt most closely resemble what I would like to develop are the Rocky movies and Big Trouble in Little China.  All of them exhibit city level contained field fighting which is what I will require to have a pleasing aesthetic for my game.  Additionally they both had fantasy elements which impacted individuals going about their day-to-day lives.

Fatalfury.com

Streetfighter.com

Movies.com

IMDb.com